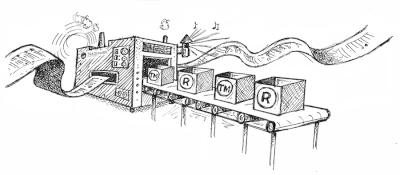
In this article, you will learn the step-by-step process of electronically submitting a trademark specimen, starting from preparing the images and metadata to managing submissions and maximizing their impact. Additionally, you will understand how to create and manage an account on a specimen submission platform, navigate the review process, and share data with the scientific community. The article also highlights best practices for maintaining data accessibility and citing your electronic specimen submissions in your publications.
How to submit a specimen electronically

Preparing a scientific manuscript for electronic submission requires careful attention to details, including the selection of the proper submission method, the preparation of specimen images, and the organization of metadata and associated files. This article outlines the steps necessary to ensure a smooth and successful submission process.
Selecting the Proper Submission Method
The first step in preparing your manuscript for electronic submission is to determine the best platform for submitting your work. Review the guidelines of journals or other publication venues (such as conferences, workshops, preprint servers, or online repositories) in your field to understand their specific instructions, requirements, and preferences.
Factors to consider when selecting a submission method include: 1. Scope and topic fit: Ensure your manuscript is within the scope and covers a topic relevant to the journal or conference you are targeting. 2. Formatting and style guidelines: Familiarize yourself with the specific guidelines for formatting, references, and style that are required by the venue (e.g., via dedicated style guides or LaTeX templates). 3. File formats: Understand the specific file formats accepted by the submission platform, as well as any restrictions on file size or naming conventions. 4. Submission fees: Be aware of any submission or publication fees associated with the journal or conference, and ensure that you have budgeted for these costs. 5. Peer review process: Familiarize yourself with the review process followed by the venue, as well as any policies on anonymity or double-blind review that may require adjustments to the submitted materials.
Preparing the Specimen Images
Many scientific publications require the submission of high-quality images showcasing the specimens or experiments under investigation. In order to present your research convincingly and accurately, follow these guidelines when preparing specimen images for electronic submission:
- Format: Save your images in the preferred file format mentioned in the guidelines (usually TIFF, JPEG, or PNG). Avoid using lossy file formats such as JPEG, which may compromise image quality when compressed.
- Resolution: Ensure that your images have a sufficient resolution (usually a minimum of 300 dpi) to ensure clarity and legibility when printed or viewed on a screen.
- Scale and labeling: Include appropriate scales (e.g., a size bar or magnification factor), labels, and captions that describe the image contents and relate it to the accompanying text.
- Image editing: Adjust brightness, contrast, and color balance as necessary to improve the visual quality of the image. Avoid excessive alterations that may misrepresent the original data or introduce artifacts.
- File size: Compress images using lossless techniques to minimize file size while retaining image quality. Be aware of any submission platform restrictions on file size and adhere to these limits.
Preparing Metadata and Associated Files
Metadata and associated files are essential components of a manuscript submission, as they provide the necessary context and supplementary information for readers and reviewers. Follow these tips to prepare your metadata and associated files for electronic submission:
- Cover letter: Prepare a cover letter that introduces your manuscript, highlights its significance, and specifies the submission category (e.g., original research, review, or short communication). Additionally, mention any conflicts of interest, funding sources, or acknowledgments.
- Metadata: Provide all required metadata for your manuscript, including information such as the title, authors, affiliations, keywords, abstract, and running head. Ensure that metadata are accurate and written in accordance with the style guidelines of your target journal or conference.
- Supplementary materials: Organize any supplementary materials (such as additional images, tables, data sets, or code) that you wish to submit alongside your manuscript. Ensure that these files are easily accessible, properly formatted, and described in a separate "Supplementary Information" document, if required.
- Permissions: Obtain any necessary permissions for copyrighted material (such as previously published figures, tables, or extensive quotations), and include copies of these permissions in your submission.
- Revision history: Maintain a record of the version history of your manuscript and any files associated with it. This will help you track revisions and respond to reviewer feedback more efficiently.
- Proofreading: Thoroughly proofread your entire submission package—including the manuscript, images, metadata, and associated files—prior to submission. If necessary, enlist the help of colleagues or professional editing services to ensure that your submission is free of grammar, spelling, and punctuation errors.
By carefully following each of these steps, you will be well-prepared to submit your manuscript electronically and increase your chances of a successful publication.
Creating an Electronic Submission Account
Creating an electronic submission account allows users to easily and securely submit specimens or samples to a laboratory for testing, analysis, or identification. It typically involves registering on a specimen submission platform, as well as understanding user roles and permissions associated with the account. Let's delve into these processes.
Registering on the Specimen Submission Platform
Registration on an electronic specimen submission platform is the first step to set up an account and access the system. The steps involved in the registration process may differ among platforms, but here are some general guidelines:
- Navigate to the registration page of the specimen submission platform associated with your laboratory or organization of interest.
- Enter your personal information (this may include your first and last name, email address, and phone number). Other optional fields such as title and organization may also be requested.
- Create a unique username and a strong password. Choose a password that you can remember, but that is also difficult to guess. Your password should contain a combination of uppercase and lowercase letters, numbers, and special characters.
- Some platforms may require you to select a security question and provide an answer. This helps to add an extra layer of security to your account and will assist in account recovery if you ever forget your username or password.
- Agree to the platform's terms and conditions or privacy policy, if applicable.
- Click on the "Register" button to submit your registration request. After submitting the request, you may be prompted to verify your email address by clicking on a verification link sent to the email provided during registration.
- After verifying your account, you should receive a confirmation email and be able to access the submission platform by logging in with your username and password.
Note that some platforms may require administrative approval before allowing you to access the system. In this case, you will be notified via email when your account is approved, and you can begin submitting specimens.
Understanding User Roles and Permissions
Upon successful registration, users are assigned roles or permissions that determine their capabilities within the electronic submission platform. Understanding these roles and permissions is crucial to effectively use the platform and maintain proper security measures.
There can be different levels of user roles:
- Administrator: These users have full access to the platform, including the ability to manage user accounts, create user roles, and assign permissions. They can also view, edit, and approve specimen submissions, as well as generate and analyze reports.
- Submitter: Submitters have the primary task of submitting specimens or samples to the platform. They can create new submissions, track the status of their submissions, and view any test results associated with their account. Submitters typically have limited access to other parts of the system.
- Reviewer: Some platforms may have a reviewer role for users who have the responsibility of reviewing and approving submitted specimens before they are sent to the laboratory. This role often comes with the ability to edit submission-related information and communicate with the submitter, but generally has limited access to other parts of the system.
- Laboratory Technician: Users with this role are responsible for analyzing and processing specimens and entering the test results into the platform. They may have access to a specific workspace that allows them to view submission details and test results.
Understanding the user roles and permissions within an electronic submission platform is essential for effective collaboration among team members, ensuring data security, and maintaining proper workflows.
Submitting a Specimen Electronically
The process of submitting a specimen electronically has become a convenient and time-saving method for researchers and collectors to provide important information about the specimen to institutions. This method not only ensures the preservation and accessibility of the data for future studies but also makes it easier for researchers to collaborate on projects and share findings. This article will walk you through the steps of submitting a specimen electronically, including uploading specimen images, entering specimen metadata, uploading additional files, and reviewing and submitting the electronic submission.
Uploading Specimen Images
The first step to submitting a specimen electronically is to capture clear and well-lit images of the specimen. These images should show the specimen in its entirety, from various angles, as well as any specific features or details of scientific interest. It is essential to ensure the images are in a high-resolution and standard file format (e.g. TIFF, JPEG, or PNG) to facilitate their viewing and analysis.
Once the images are ready, you can upload them to the designated institution's online submission platform. You may be required to log in or create an account to access the platform. Then, navigate to the specimen submission page and follow the prompts to upload your images. Some platforms may have specific requirements for image size and format, so be sure to check these guidelines before submitting your files.
Entering the Specimen Metadata
After uploading the images, you will need to enter the specimen metadata. This information is essential for understanding the context, history, and relevance of the specimen to further research. Metadata typically includes the following information:
- Taxonomic classification: The genus, species, and other relevant taxonomic information about the specimen.
- Locality: The geographic location where the specimen was collected, including coordinates, elevation, and habitat.
- Date of collection: The day, month, and year when the specimen was collected.
- Collector: The person or team responsible for collecting the specimen.
- Description: A detailed description of the specimen, including measurements, colors, textures, and other relevant features.
- Preservation method: The technique used to preserve the specimen (e.g., formalin, ethanol, dry storage).
- Institutional affiliation: The institution or organization with which the specimen is associated.
- Identifiers: Any unique identifiers assigned to the specimen by the collector or institution, such as catalog numbers or barcodes.
Make sure to provide complete and accurate metadata to facilitate the proper cataloging and research of your specimen.
Uploading Additional Files
In addition to images and metadata, you may also need to upload supplementary files related to your specimen. These files could include field notes, permits, or other documents that provide context and authenticity to the specimen record. The formats and types of documents accepted may vary depending on the institution or organization, so be sure to consult their submission guidelines.
To upload these files, navigate to the appropriate section on the online submission platform and follow the instructions provided. You may need to add descriptions or captions to these files to clarify their content and purpose to reviewer.
Reviewing and Submitting the Electronic Specimen Submission
Once you have uploaded your images, entered the specimen metadata, and added any additional files, carefully review your submission for accuracy and completeness. Double-check the information you have provided to ensure it is correct and consistent with any applicable guidelines.
Once you are satisfied with your submission, proceed to submit it electronically using the platform's submission button or corresponding feature. You should receive a confirmation message or email to indicate that your submission has been received successfully. Oftentimes, a designated review process by experts or curators follows, and they might request additional information or clarifications before officially accepting the specimen into their collection.
In summary, electronically submitting a specimen involves capturing high-quality images, entering comprehensive metadata, providing supplementary documentation, and reviewing your submission for accuracy before sending it off. By following these steps, you contribute to the scientific community's knowledge base and facilitate collaboration among researchers worldwide.
Navigating the Review Process
The review process is an essential part of publishing articles in academic journals, books, and conferences. It ensures the quality and originality of the content being published, and that it meets the standards of the scholarly community. Navigating the review process can be challenging, as it often requires dedication, patience, and resilience. In this article, we will guide you through the review process, explaining the different stages and discussing how to effectively respond to reviewers' comments and feedback.
Understanding the Review Stages
The review stages may vary depending on the type of publication (journal, book, or conference), but the general process involves the following stages:
- Submission: The first step in the review process is to submit your manuscript to a journal, book, or conference. Prior to submission, you should ensure that your work adheres to the guidelines specified by the publisher, including formatting, word count, and citation style. Remember to carefully proofread and edit your work before submission, as typographical and grammatical errors may reflect poorly on the quality of your manuscript.
- Editor Assessment: After submitting your manuscript, it will go through an initial assessment by the editor. In this stage, the editor will determine whether your work aligns with the journal's scope and goals or whether it has the potential to make a significant contribution to the field. If the editor finds your manuscript not suitable for their journal, they may reject your submission without further reviews. If not, your paper will be sent for peer review.
- Peer Review: The core of the review process is the peer review stage. Your manuscript will be sent to independent experts in your field, known as reviewers, who will assess your work based on its originality, methodology, clarity, and significance. Reviewers can recommend one of the following outcomes: Accept without revision, minor revisions, major revisions, or reject. The editor will then synthesize the reviewers' recommendations and provide you with their decision.
- Revision & Resubmission: Based on the editor and reviewers' feedback, you may be asked to revise and resubmit your manuscript. This stage is your opportunity to address the concerns and suggestions raised by the reviewers. Be sure to thoroughly address each comment and make the necessary improvements to your work. After revising your manuscript, you will resubmit your revised paper along with a response to the reviewer's comments that details the changes you made.
- Final Decision: Upon receiving your revised manuscript, the editor or reviewers may evaluate it again to ensure that the suggested revisions have been adequately addressed. If the editor is satisfied with your revisions, your manuscript will be accepted for publication. However, if there is still concern regarding your manuscript, you might be asked for another round of revision or face rejection.
Responding to Reviewer Comments and Feedback
Receiving reviewer comments and feedback is an integral part of the review process. Here are some guidelines on how to effectively respond to reviewers:
- Be Patient and Professional: Take some time to absorb the reviewers' comments as they can provide valuable insights that can strengthen your manuscript. Approach this process with patience and professionalism. Avoid reacting defensively or emotionally, as that can negatively influence your relationship with the editor and reviewers.
- Organize Your Response: Break down reviewer comments into manageable sections, addressing each point separately. It is clear and concise in your explanations, backing up your arguments with data or citations from relevant literature.
- Address All Comments: Ensure that you address all feedback, even if you disagree with a reviewer's suggestions. If you do not agree with a comment, provide a well-reasoned argument for your decision.
- Be Thorough: While making revisions to your manuscript, be sure to address even minor comments and concerns. Demonstrating your commitment to improve your work can have a positive impact on the reviewers and editor's evaluation.
- Follow Submission Guidelines: When resubmitting your revised manuscript, ensure that you adhere to the publisher's guidelines and provide a detailed and organized response to reviewer comments that specifies the changes you made and the reasoning behind them.
Navigating the review process can be a challenging and lengthy endeavor but maintaining a positive, patient, and professional attitude can help you successfully overcome the challenges within the process. By understanding the stages of the review process and effectively responding to reviewer comments, you can increase the likelihood of having your manuscript accepted for publication and ultimately contribute to the advancement of knowledge within your field.
Managing Your Electronic Specimen Submissions
Managing your electronic specimen submissions is an essential task in the realm of scientific research and publication. Lack of proper management can lead to disorganization, delays in processing, and even rejection of submitted articles. This article aims to provide valuable guidance on how to manage and keep track of your electronic specimen submissions effectively. In this article, we will focus on editing an existing submission, tracking the status of your submission, and withdrawing a submission.
Editing an Existing Submission
Sometimes, you may need to edit your submitted specimens either to update the information, correct errors, or per the journal's request. To edit an existing submission effectively, follow these steps:
- Log in to the journal's submission system: Access the journal's online submission system with your username and password. If you have forgotten your login credentials, there is usually a password recovery option available.
- Locate your submission: Once logged in, navigate the dashboard or list of your submissions and select the one you need to edit.
- Make the necessary changes: Confer with the file system and follow the journal's guidelines for uploading revised documents or making amendments to the manuscript metadata. This step varies across different platforms and depends on the edits that are required.
- Save and submit your changes: After making the desired changes, ensure you save the updated version and submit it as required. Keep a copy of the edited submission for future reference.
- Communicate with the editor: In case significant alterations were made, it is wise to notify the editor or editorial staff about the changes. A brief and polite email outlining the edits you made can suffice.
Tracking the Status of Your Submission
Knowing the status of your electronic specimen submission is crucial to stay informed about the peer review process. To do this:
- Log in to the journal's submission system: Access the journal's online submission system with your username and password.
- View submission status: Locate your submitted manuscript in the dashboard or list of your submissions, and you should find its current status alongside it.
- Understand the status tags: Journals use different status labels to indicate the stage of the review process. Some common stages include “Under Review,” “With Editor,” “Decision Pending,” and “Revisions Required.” Familiarize yourself with these stages to understand the progress of your manuscript.
- Check for email notifications: The journal should send updates to the email address associated with your account. Regularly check your inbox and spam folders for notifications related to your submission.
- Be patient: Peer review can take several weeks to a few months. If your submission is taking longer than expected, you can contact the journal after an appropriate length of time has passed.
Withdrawing a Submission
In certain circumstances, you might need to withdraw your submitted manuscript. Here's how to go about it:
- Reread the journal's withdrawal policy: Before attempting to withdraw, check the journal's guidelines regarding withdrawals as some may have specific procedures or charge withdrawal fees.
- Contact the editor: Send a polite and concise email to the editor, requesting the withdrawal of your submission. Provide the detailed reasons for the request and any information that might facilitate a smooth withdrawal process.
- Wait for the editor's response: The editor will typically respond, confirming your withdrawal request or requesting additional information. Be patient and cooperative during this process.
- Keep a record: Save email correspondence and document any withdrawal fees paid for future reference.
Managing and keeping track of electronic specimen submissions are vital aspects of manuscript submission. By familiarizing yourself with the journal's guidelines and following the steps outlined above, you can ensure a smooth and efficient submission process.
Maximizing the Impact of Your Electronic Specimen Submission
Electronic specimen submission has become an increasingly important aspect of scientific research. By sharing your digital specimens online through public repositories, you can not only expand the reach of your work but also contribute to the ever-growing knowledge base in your field. In this article, we will discuss the key principles of data sharing and accessibility, how to add your specimen data to public repositories, and the importance of citing your electronic specimen submission in your publications to maximize their impact.
Principles of Data Sharing and Accessibility
Data sharing and accessibility are crucial components of the scientific community. The following principles will help guide you in ensuring that your digital specimens are accessible to the widest possible audience:
- Open access: Whenever possible, your specimens should be submitted to public repositories that promote open access to the data. This will ensure that a broad range of researchers and other interested parties can access your data without barriers.
- Metadata: Including detailed metadata is vital for your electronic specimen submission. This may include information such as specimen type, collection date, location, taxonomic information, and any other relevant details. This metadata will help others to understand and reuse your data in their research.
- Standardization: Adhering to standard data formats and protocols in your specimen submission will make it more accessible and much easier for others to use and interpret. Consider following established data standards in your field, such as Darwin Core for biodiversity data or MINiML for gene expression data.
- Licensing: Be mindful of licensing and copyright issues when sharing your data. By applying a permissive license, such as a Creative Commons license, you can specify how your data can be reused, while still retaining some intellectual property rights.
Adding Specimen Data to Public Repositories
There are many public repositories where you can submit your electronic specimen data. Some repositories cater to specific fields, while others are more general-purpose. The following steps outline the process of adding your specimen data to a public repository:
- Research: Investigate the various repositories available to find one that is suitable for your field and dataset. Some repositories may require a certain data format, so make sure your data is compatible. Additionally, look for repositories that promote open access and have a large user base within your field.
- Registration: Register for an account with your chosen repository. This may involve providing contact details and agreeing to the repository's terms of service.
- Prepare your data: Ensure your data is appropriately formatted and includes all necessary metadata. Make any modifications necessary to comply with the specific requirements of the repository.
- Upload your data: Follow the repository's submission process to upload your data, metadata, and any additional supporting files. Take care to provide accurate and complete information during this process.
- Review and submit: Carefully review your submission to ensure all data and metadata are accurate, and make any necessary corrections. Finally, submit your data to the repository, and await acknowledgment of your submission.
Citing Your Electronic Specimen Submission in Publications
Once your electronic specimen data is submitted and publicly available, it is crucial to appropriately cite your submission in your publications. This will allow others to easily locate and access your data, promoting its reuse and increasing its impact within the scientific community.
- Include a data accessibility statement: Clearly state in your publication that the data underlying your research is publicly accessible and provide the repository where it is hosted.
- Cite the repository: In your publication's reference list, provide a citation for the repository itself, including a URL and, if available, a Digital Object Identifier (DOI) specific to your dataset.
- Follow citation guidelines: Ensure your citation adheres to any specific guidelines provided by the repository and your chosen publication venue.
- Track usage: Keep track of the citations and usage of your data, as this can help to demonstrate the value and impact of your research to funding agencies and tenure committees.
By following these guidelines, you can maximize the impact of your electronic trademark specimen submission, contributing to the growth of knowledge in your field and promoting open access to valuable research data.
What are the requirements for submitting a specimen electronically?
To submit a specimen electronically, ensure the sample image is clear and accurately represents the goods or services offered. Upload the image in an acceptable format such as JPEG or PDF, ensure correct specimen type selection, and follow the size and file naming requirements.
What role does the USPTO play in specimen submission?
The United States Patent and Trademark Office (USPTO) reviews electronic submissions of specimens for compliance with trademark regulations. This agency maintains the Trademark Status and Document Retrieval (TSDR) system for uploading and tracking specimen submissions.
How do I ensure my specimen is acceptable for electronic submission?
Ensure your specimen meets the statutory requirements, such as showing trademark use in interstate commerce. The submitted image should clearly display the mark as it appears on the goods or services, identify the correct class, and include all necessary explanatory information.
Can I submit multiple specimens at once?
Yes, multiple specimens may be submitted using appropriate tools provided by the USPTO. Ensure each specimen complies with the requirements, includes proper classification, and submits all necessary fees for processing.
What do I do if my specimen is rejected?
If a specimen is rejected, review and understand the reasons provided by the examining attorney. Address the issues, make necessary corrections, and resubmit the specimen with modifications or provide an alternative specimen that adheres to trademark regulations.
How do I pay for the fees when submitting a specimen electronically?
Upon submitting a specimen electronically, fees can be paid through the USPTO's payment gateway. Use an acceptable method, such as a credit card or deposit account, to ensure timely processing of the application.
Subscribe to Trademark Wednesdays, our weekly newsletter where we'll send fun and informative trademarking topics straight to your inbox.